Forking about
After sorting my rear shock out, thoughts moved to suspension setup and the front end suddenly looked less than sorted. A short bit of messaging to Classic Racing Green had me working on a plan.
The VFR had a Honda CBR600 F3 front end stuck on it when I converted the bike a couple of years ago for racing. Other than change some fork seals and a fluid change, I didn't really play about with the forks much.
Andy at Classic Racing Green sent me to the Race Tech website where, after plugging in some details, it recommended some rather heavy fork springs. This was for a CBR600 F3 however and not a lardy VFR750 but even then we thought it was a bit excessive.
The front spring rate I was being recommended was: 1.24 kg/mm where the stock rate was: 0.7 kg/mm. Now normally you work in Newtons when doing fork setup (multiply by gravity 9.81) so that does need taking into account here but this spring rate seemed to high to Andy.
 I could however manipulate the figures it would give me, I just needed to weigh the bike. A loaded set of baggage scales revealed I had 96 kg on the front and 102 at the rear for 198kg of wet bike. Armed with this and a lot of discussion Andy ordered me some K-tech springs which arrived the next day.
 The front end was pulled out of the VFR, and cartridges removed so the lot can be drained. I do love having an impact gun as remembering you need to take the fork top off after removing the forks is no longer a problem.
What was a problem however was that I couldn't get the inner stanchions out.
 Normally I remove the dust seal and circlip; then just slide the inner stanchion in and out to its stop like a slide hammer till the seal pops out but for whatever season this was not working.
I ended up carefully chiselling out one seal, popping out the washer then taking a look at what was going on. It looked like the bushes were riding over each other but with the seal now removed I could coax them out with a fair bit of hammering. I vaguely recalled having a similar issue last time I disassembled the fork legs.
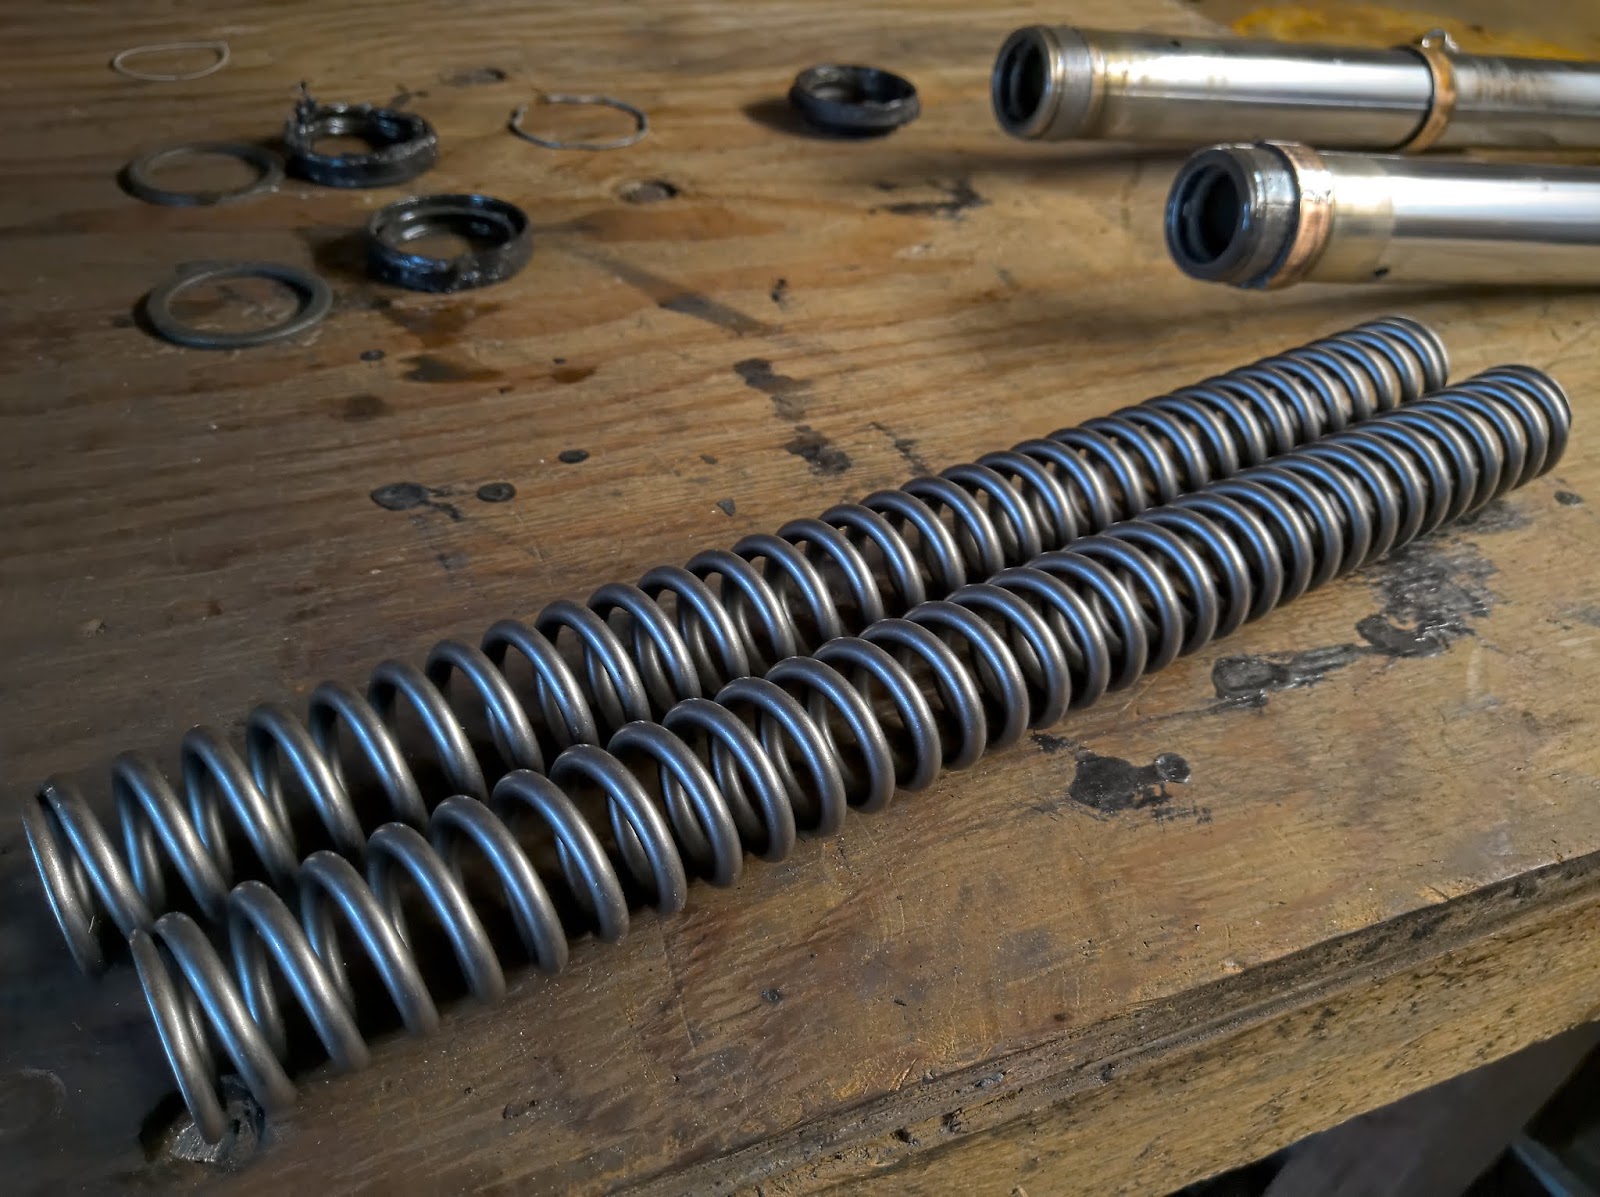
 When the legs finally came apart, their bushings teflon was badly damaged so I was glad I had ordered a new set to combat the amount of friction in the fork legs.
 Now back to the dampers: I had removed the top nuts and slid the OEM CBR600 progressive springs off. I could then manipulate the damper till I had access to the circlip on the bottom of the damper unit so the rest of the internals could then be slid out. This allowed me to clean out a wealth of gunge from the dampers themselves.
 I went so far as to seperate the shim stacks and clean them out with alcohol taking care to lay them out in order so I didn't make a pigs ear of reassembly.
I may well replace more components in the legs such as the needle and shim stack as much finer adjustable items are out there now.
 Once everything was nice and clean I put the legs back together before I dropped them in something, or dropped something on them, or something furry made a house in them. My fancy pants K-tech linear springs were thrown into the mix too.
I had previously shimmed out the spacers on my forks which I took out for now as, in theory, the legs don't need them now.
 Whilst all this was going on I had thrown a bit more paint on the fork leg bottoms. When I had painted them last time I had intended to use the stone guards which had clearance issues. When they were removed they left a nice ring of flaky old paint at the top of the legs which I was glad to see gone.
New seals and dust covers finished the look so I wasted no time in popping them back into the bike.
Motul 10 weight fork oil was measured out and each leg was refilled with the help of a funnel.
Final setup was done a little while later with preload and rebound damping adjusted to suit my weight. I won't bore you with the method, there are plenty of books that will do a far better job of that.
The end results are a higher sitting fork leg with a far healthier static sag than the slightly soggy 25 year old OEM CBR600 setup. I also had managed to loose a bit of stiction too so lets hope this full front and rear upgrade is worth all this effort (and money).

The front spring rate I was being recommended was: 1.24 kg/mm where the stock rate was: 0.7 kg/mm. Now normally you work in Newtons when doing fork setup (multiply by gravity 9.81) so that does need taking into account here but this spring rate seemed to high to Andy.

 The front end was pulled out of the VFR, and cartridges removed so the lot can be drained. I do love having an impact gun as remembering you need to take the fork top off after removing the forks is no longer a problem.
What was a problem however was that I couldn't get the inner stanchions out.
 Normally I remove the dust seal and circlip; then just slide the inner stanchion in and out to its stop like a slide hammer till the seal pops out but for whatever season this was not working.
I ended up carefully chiselling out one seal, popping out the washer then taking a look at what was going on. It looked like the bushes were riding over each other but with the seal now removed I could coax them out with a fair bit of hammering. I vaguely recalled having a similar issue last time I disassembled the fork legs.
 When the legs finally came apart, their bushings teflon was badly damaged so I was glad I had ordered a new set to combat the amount of friction in the fork legs.
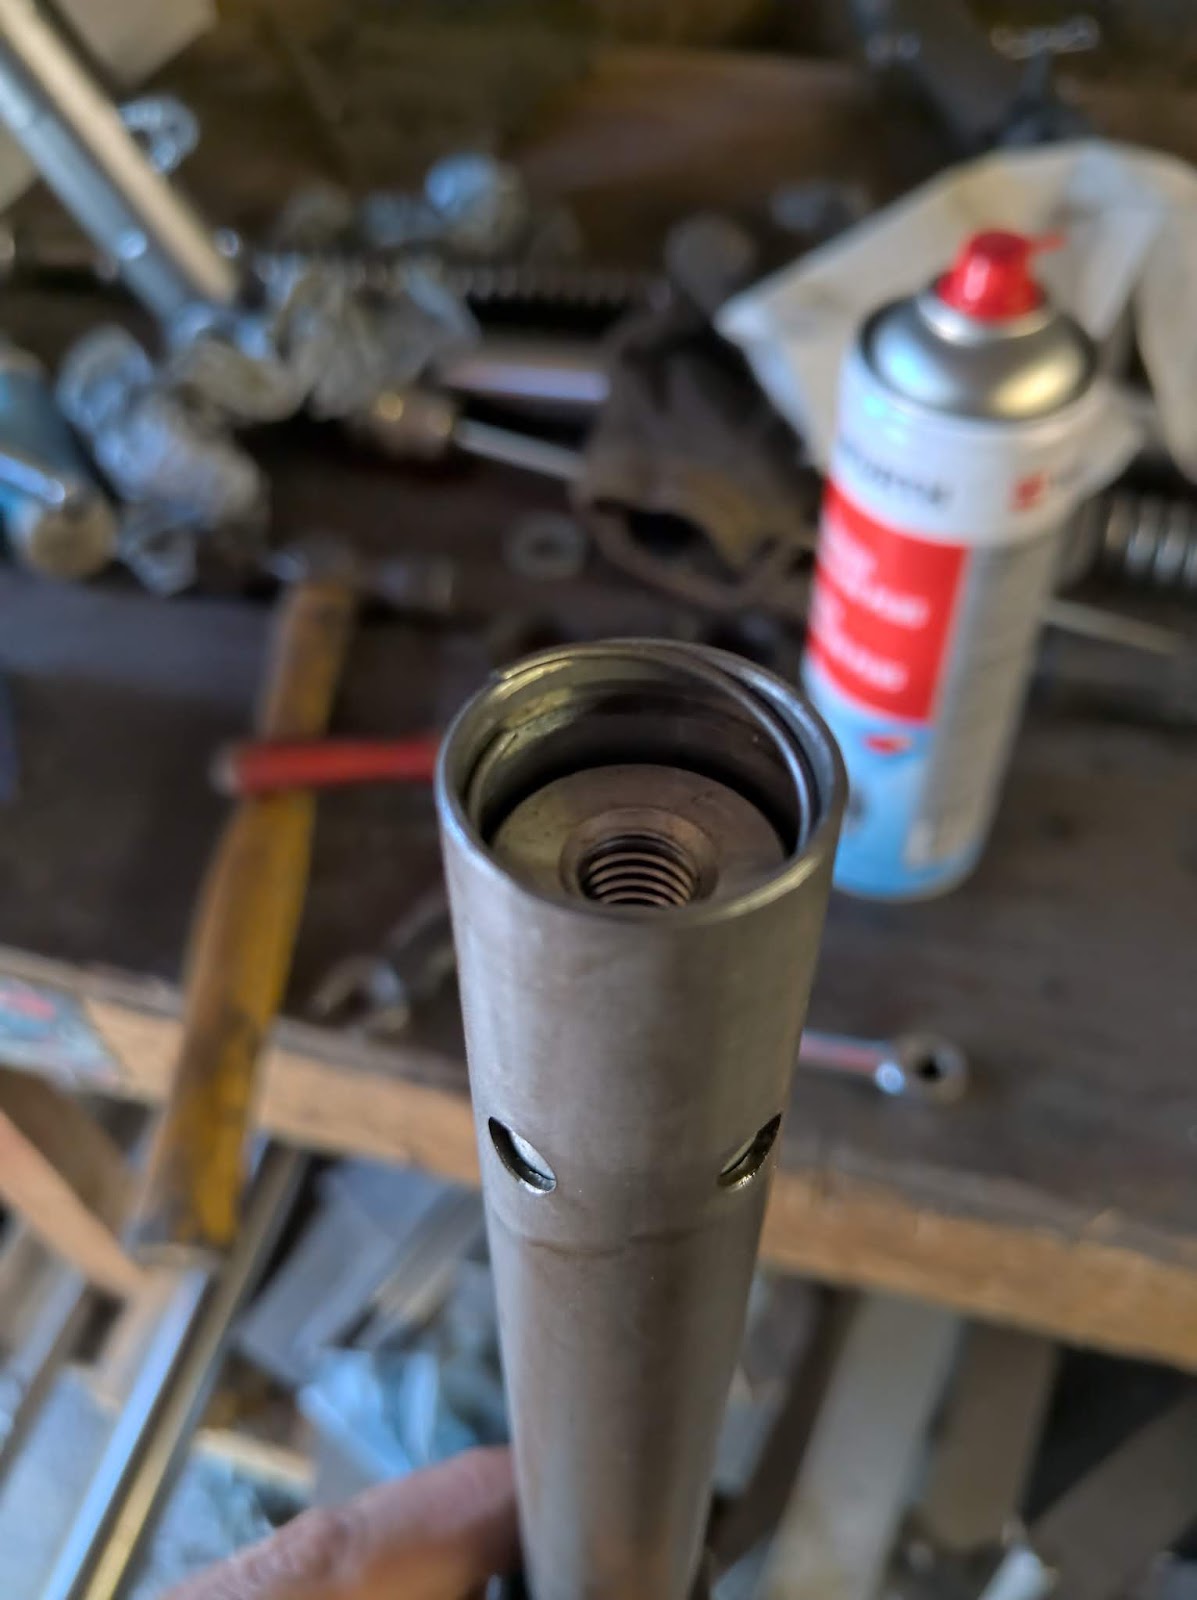 Now back to the dampers: I had removed the top nuts and slid the OEM CBR600 progressive springs off. I could then manipulate the damper till I had access to the circlip on the bottom of the damper unit so the rest of the internals could then be slid out. This allowed me to clean out a wealth of gunge from the dampers themselves.
 I went so far as to seperate the shim stacks and clean them out with alcohol taking care to lay them out in order so I didn't make a pigs ear of reassembly.
I may well replace more components in the legs such as the needle and shim stack as much finer adjustable items are out there now.
 Once everything was nice and clean I put the legs back together before I dropped them in something, or dropped something on them, or something furry made a house in them. My fancy pants K-tech linear springs were thrown into the mix too.
I had previously shimmed out the spacers on my forks which I took out for now as, in theory, the legs don't need them now.
 Whilst all this was going on I had thrown a bit more paint on the fork leg bottoms. When I had painted them last time I had intended to use the stone guards which had clearance issues. When they were removed they left a nice ring of flaky old paint at the top of the legs which I was glad to see gone.
New seals and dust covers finished the look so I wasted no time in popping them back into the bike.
Motul 10 weight fork oil was measured out and each leg was refilled with the help of a funnel.
Final setup was done a little while later with preload and rebound damping adjusted to suit my weight. I won't bore you with the method, there are plenty of books that will do a far better job of that.
The end results are a higher sitting fork leg with a far healthier static sag than the slightly soggy 25 year old OEM CBR600 setup. I also had managed to loose a bit of stiction too so lets hope this full front and rear upgrade is worth all this effort (and money).


Comments
Post a Comment